Showing posts with label Product Review. Show all posts

Thursday, 12 February 2015

Eczema Balm

Sera had eczema on her left inner elbow. She didn't like the smell of the eczema cream I bought from a retail store so she refused to use it after applying 2 to 3 times. Normal moisturizer only helped to relieve the itch temporarily and was not able to clear the eczema rashes.

I happened to see this Theo10® Skin balm sold online and read many positive reviews about it. It could also help with minor cuts, burns, insect bites and nasal congestion. Since it could also be used for other purposes (in case Sera refused to use it), Ardon and I decided to give it a try. It was not expensive and was manufactured in Singapore. 


After about 3 applications, we saw an improvement on her inner elbow. Rashes started to clear and her skin felt smoother. According to Sera, the balm did help to soothe or numb the itchiness.


1st day after application

3rd day after application

The downside was this balm had a very strong peppermint smell. However, it was the premium peppermint essence that helped to numb the area to stop the itch. Fortunately Sera didn't mind the smell and was willing to use it. Her only concern was that Lynn could not stand the smell. So considerate!


Thursday, 29 January 2015

Ebi-fry

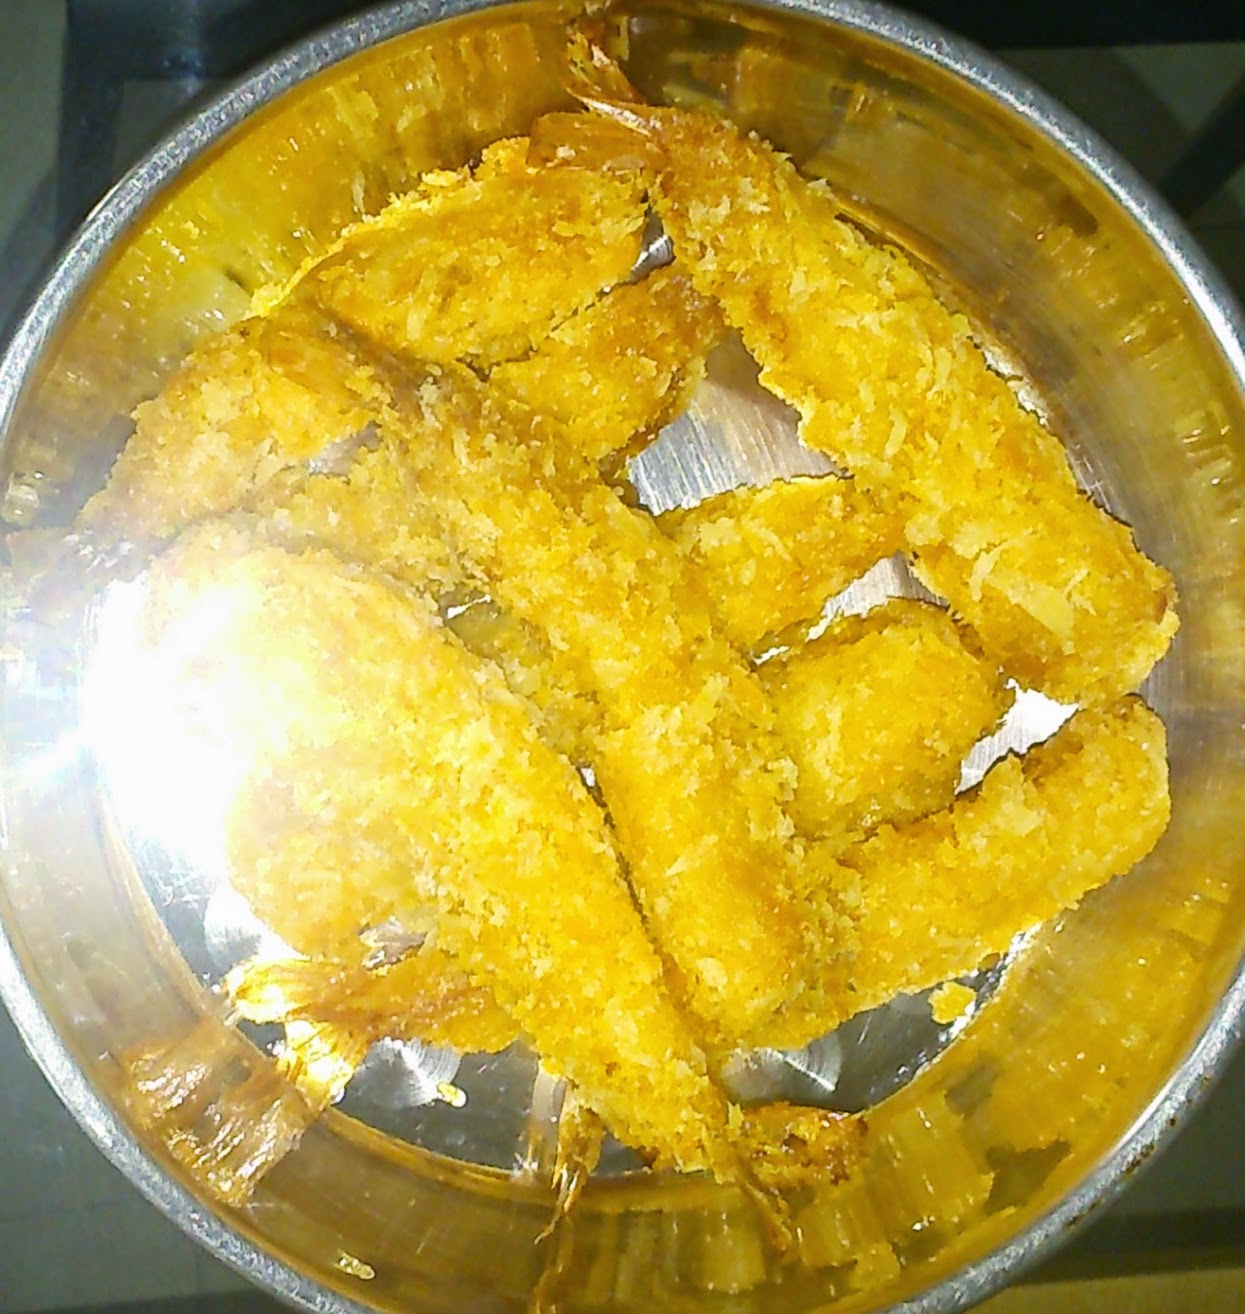
A few weeks ago, I found this Ebi-fry in the frozen section of NTUC hypermarket. 


Big prawns are usually quite expensive but the price for this Ebi-fry (already marinated and coated with bread crumbs) was reasonable, so we bought one packet to try out.

Yesterday, I finally took it out from our freezer. There were no instructions on how to cook this. What I did was put some oil in a deep baking tray and coat both sides of the prawns with oil. Then I placed the tray into our convection oven, set the temperature at 220 degree Celsius and heated it for about 20 minutes. I am using our oven as a multi-cooker :p. 

After about 20 minutes, the prawns were cooked but I found them a bit too soft probably due to the oil. So I placed them onto another dry shallow pan and heated it in the oven toaster for another 3 minutes. On taking out the prawns, they were still a bit soft. However, when we ate the prawns, they were okay - crispy on the outside and soft inside. Tasted good too - not too salty and not too bland.


Ebi-fry

Perhaps next time, I should put less oil. They should turn out better after 20 minutes of heating.

Tuesday, 24 December 2013

Curry Chicken

Cooking curry chicken used to be a daunting task. My late grandma was a nonya and was very good at cooking curry. Whenever she wanted to cook curry, she would put all the spices needed into a motar and pound them to make the curry paste. She would make coconut milk the traditional way by adding water to shredded coconut, placed them in a cloth to squeeze out the coconut milk just like what 蕙娘 Huiniang (played by Joanne Peh) did in the TV drama serial 《信约:唐山到南洋》 ("The Journey: A Voyage"). So basically, everything was freshly made from scratch.

Now, there are so many different brands and types of curry paste. However, I was not satisfied with the end result I had with most of the curry paste that I had tried. So, I had to combine curry powder with some sambal chilli paste and salt to get the taste and colour of the curry gravy that I wanted. 

Recently, I bought the A1 Instant Chicken Curry Sauce for cooking the curry chicken.


This was what I did. 

1. After peeling the potatoes, I put them in a bowl of salt water to prevent them from oxidising and to add a bit of saltiness to them.


2. I heated some oil in a wok and stir fried some garlic in it. 

3. Next, I put in all the chicken pieces (1.2 kg) and potatoes (300 g), then added all of the A1 Instant Chicken Curry Sauce. Mixed well, added water.

4. When the mixture started to boil, I added 2 packets of the Kara UHT Natural Coconut Cream (200 ml each, actually one packet would be good enough). Simmer for 20 to 30 minutes and it was ready to serve.


The taste was just right - spicy and salty enough. I didn't even have to add more seasoning to the curry. Just what I wanted. :)


Saturday, 2 November 2013

Metro Expo Sale from 1 Nov - 3 Nov 2013

Metro is currently having its Metro Expo sale at the Singapore Expo from 1 Nov to 3 Nov 2013, at hall 4. 

With only about one hour to shop around yesterday, naturally shopping for clothes was out for us (have to spend time queuing for a fitting room and change). The next thing to look out for were bargains for shoes and other items.

When we were at the right corner (looking in from outside) of hall 4, we saw some ribbons meant for Christmas tree decorations. Metro was selling them at 5 for $15. I didn't want to get five rolls of ribbons, then I realized that we could mix many different items to make up the numbers. After looking around, I finally decided on these 5 items.


Ribbon

Bells for Christmas tree decorations

Accessory holder

Accessory holder


The accessory holders shown in the pictures above were available in 3 colours, two of which I had bought. The other colour was black and light grey. These could hold hook earrings and bracelets on top as well as small stud earrings and rings below. 


The accessory holder above was in the shape of a lady's body. This could hold necklaces, bracelets, bangles, rings, hair ties and hook earrings.

I think this was a good deal. Normally, such accessory holders would cost about $10 each. 

Other items that were sold at 5 for $15 were piggy banks of various shapes, party masks, party hats and other Christmas tree decorations.  

The pictures below shows the accessory holders with accessories on them.


Tuesday, 29 October 2013

Remico Double Grill Frying Pan - Part 2

I had previously written a post on the Remico Double Grill Frying Pan on our Ace Swan Blog. I had used the pan several other times to cook other dishes but I did not take any pictures then.

Yesterday, I used the Remico Double Grill Frying Pan to fry some fish. As Remico Double Grill Frying Pan had non-stick surfaces, I did not need to put a lot of oil. I was glad the fish turned out just the way I wanted it - crispy on the outside. See the picture below.


I also used it to cook my vegetables instead of the wok that I normally used.  I didn't want the hassle of having to wash the wok as well. I was glad I was able to put all the vegetables in the pan to cook.


I also noticed that by using this Remico Double Grill Frying Pan, my kitchen wasn't as oily as when using a wok for cooking/frying. It should be due to the fact that less oil was used and covering the food during the cooking/frying process.


Related post:


Tuesday, 22 October 2013

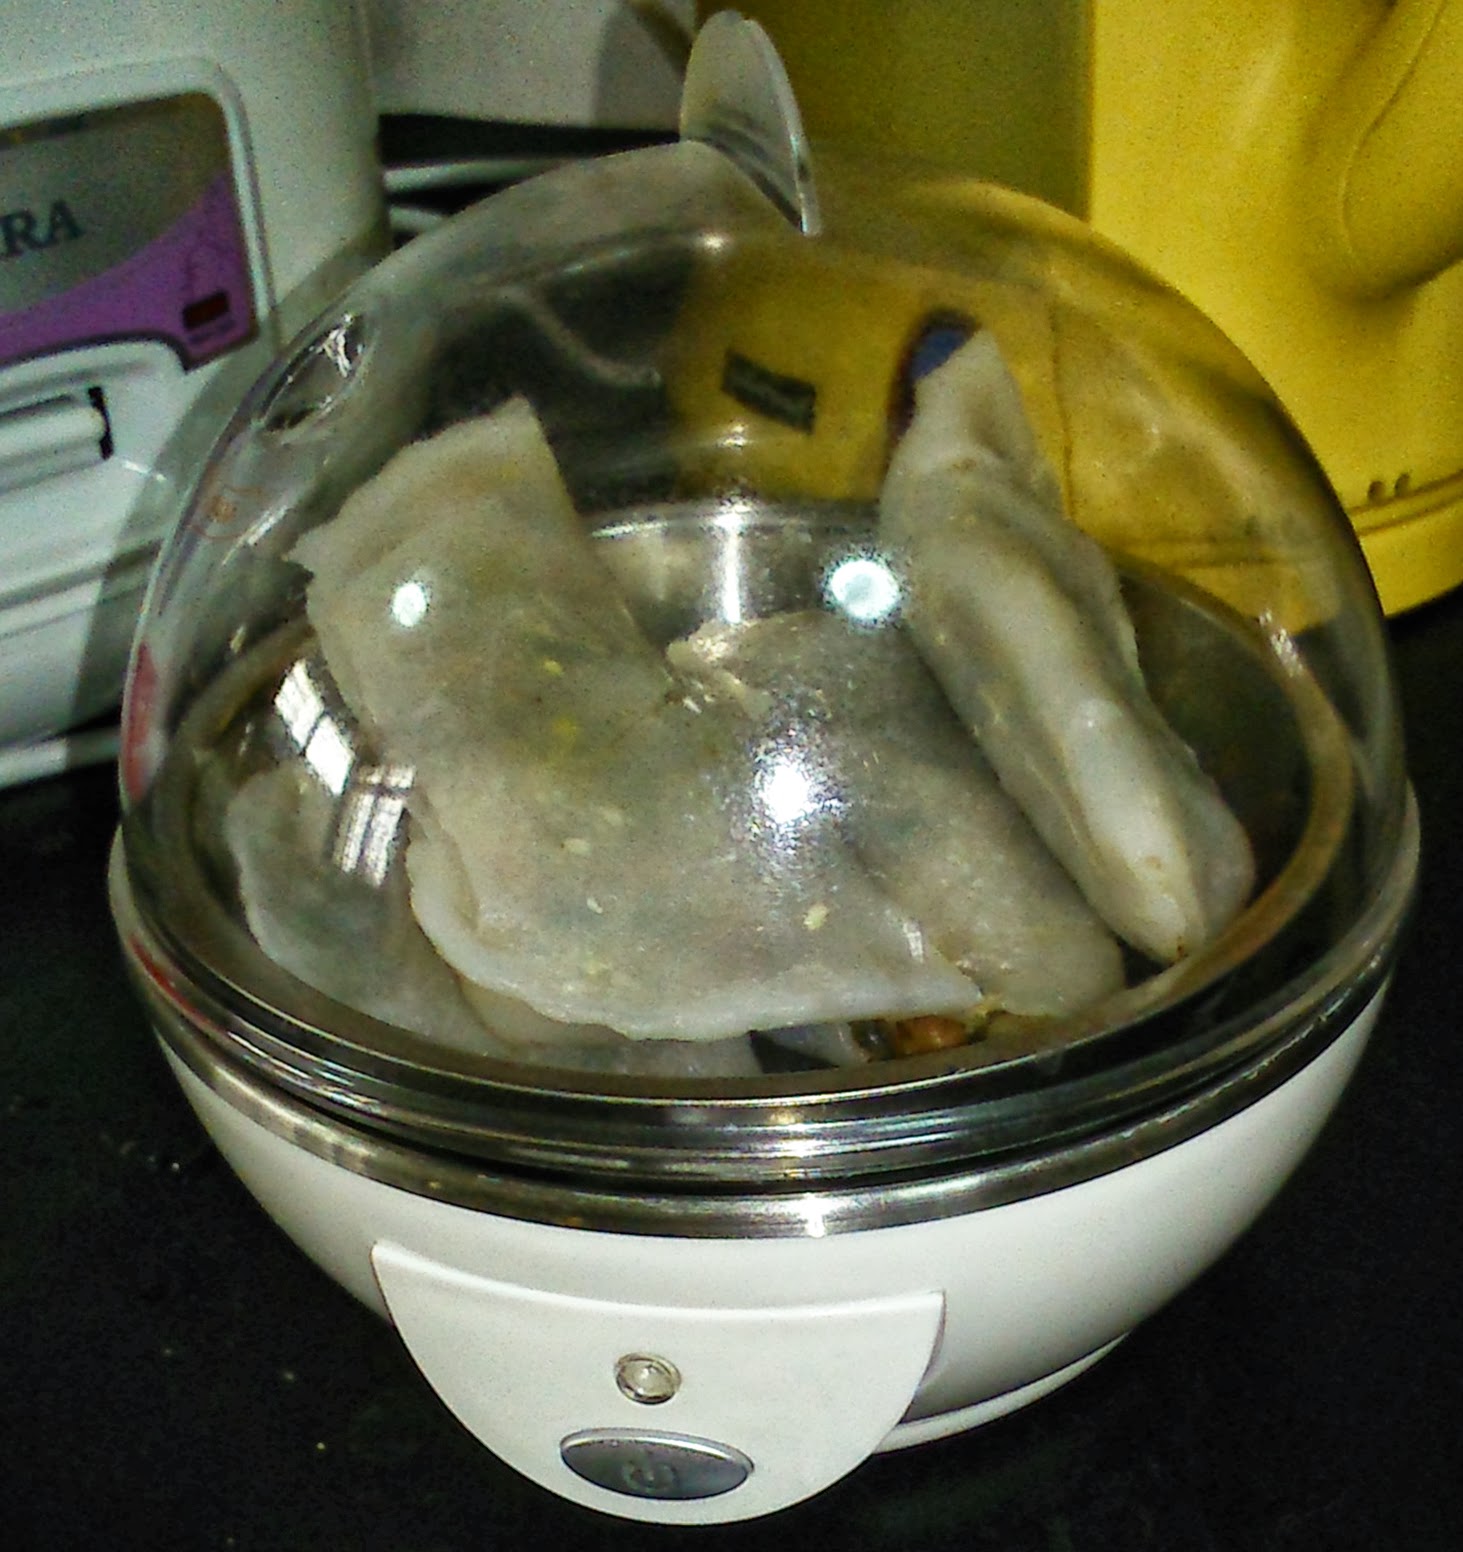
Yoei Egg Boiler - Part 4 (Heating Up of Dim Sum)

I bought some dim sum yesterday and kept it in the fridge overnight.

Today, I used the Yoei Egg Boiler to heat up these dim sum. I put 80 ml of water onto the heating plate. Then I placed the dim sum on the stainless steel bowl that came with the Yoei Egg Boiler and switch on the Yoei Egg Boiler.


After about 10 minutes, the dim sum were fully heated up and was ready to eat. Although the skin of one of the them did break a little, on the whole, they still turned out ok. Maybe next time I shall try with slightly less water.

Part 1     Part 2     Part 3


Saturday, 19 October 2013

Dining Chair from Giant Hypermart

Yesterday, we went to Giant Hypermart and saw that there were some furniture on offer. As we needed some chairs, we tried on some of chairs. In the end, we settled on the black dining chair with cushions below and behind. It was quite comfortable, and looked easy to fix. It was also quite light weight and was selling at $12.98. The cushion was probably made of faux leather. We bought two of these chairs.

After we bought the chairs, we fixed them with the screws and tool given. Ardon had difficulty tightening one of the screws for the first chair that we did. It seemed that the holes were not done as well as Ikea's furniture for DIY purposes. Nevertheless, it could still hold the parts in place. We were then surprised to find that there were no holes on the bottom of the chair cushion (not the metal support). Then we realized that we need to drill the 4 small screws from the bottom of the chair's metal support where there were holes to the bottom of the chair cushion to fix it. 


Screw drilled in from metal support to bottom of chair cushion

After Ardon drilled the 4 small screws into the holes, the chair was done and ready to use. This was how the chair looked.


The weird thing was, this chair seemed uneven and slightly shaky when no one was sitting on it. Once I sat on it, I could not feel that the chair was uneven. It did not shake like when it was empty. We had better luck for the second chair that we fixed. At least no problem with tightening of the screws.

Apart from the minor grouses and mishaps while fixing the chairs, I would think it was still a good buy at $12.98. It is not easy to find a chair with cushion at such an attractive price.


Saturday, 24 August 2013

Hair Bean Hair Brush

I first saw this Hair Bean hair brush at Mustafa Centre a few months ago. This is an "As Seen On TV" product. The packaging claimed that it can remove tangles gently. I did not buy it initially because of its shape. I was not sure if I would feel comfortable using this hair brush as it does not have a handle unlike the other hair brushes that I have. 

Subsequently I noticed that there were also sellers selling these Hair Bean hair brushes on Qoo10.sg. I read the good reviews on this. Hair Bean uses alternating bristles with Memory-Flex Technology that gently separates and removes tangles. A few weeks ago, I went to Mustafa Centre again to buy some things. I bought a new comb for Lynn and I thought it would be a good idea to get a new comb or hair brush for Sera too. Then I thought of this Hair Bean hair brush and searched for it. I managed to find it. It is only available in one colour - purple - and we bought it at around $5 (can't remember exact amount).


The Hair Bean hair brush came in a purple case with a small mirror inside the case as can be seen from the pictures above. Sera liked it with the case. It did remove tangles from her hair without causing any pain. I also realized that the shape of the brush actually made it easier for her to brush her own hair compared to other hair brushes and combs that she tried previously. 

No regrets buying this. 

banner

Monday, 8 July 2013

Hoover Floormate Spinscrub H3060

At the time when Sera started to walk, I was concerned about her slipping on the wet floor whenever I mopped the floor. When I saw the Scooba floor washer from iRobot, I was very much tempted to buy it. However, I was not too sure if it could clean well and whether it was durable. So I did some research on the internet. I read some reviews which said that one had to change the spare parts of Scooba every year to keep it going. Hmm, I would not want to spend $1000+ on something that may not last for more than 1 year.

Then I came across a review which talked about the Hoover Floormate. That got me interested. It had almost the same functions as the Scooba except that it was not robotic. The Hoover Floormate can also be used to vacuum (dry vac), scrub (wash) and dry (wet pickup) non-carpeted surfaces such as vinyl, tiles, marble and sealed wood. It cost below US$200 (excluding delivery).  I had not seen anything like this for home use in any retail store in Singapore. What impressed me even more was the dual tank technology which I will explain later. 

I ordered from an online seller from the United States (US). Actually, that was a very big risk because I wasn't even sure if the Hoover Floormate could be used in Singapore. The Hoover Floormate was manufactured for the US market so it used an electrical voltage of 120 V and frequency of 60 Hz. In Singapore, we use 230 V electrical voltage and frequency of 50 Hz.

After I received the product, we went to buy a step down transformer from a shop at Sim Lim Square. This lowered the electrical voltage to 120 V. Voila! It worked perfectly. Apparently the difference in the frequency did not affect the performance of the Hoover Floormate.


Transformer
Plug inserted into the transformer's socket
Hoover Floormate Spinscrub H3060
From the picture above, you can see that there is a mode selector dial at the side of this machine. You can choose between 3 modes - Dry Vac, Wash and Wet Pickup - just by turning the dial. The Hoover Floormate has 2 tanks. The upper tank holds detergent and water that is to be dispersed on the surface to be cleaned.  The lower tank collects the dirty water using the wet pickup mode (unlike a normal mop that tends to spread some dirty water on the floor). 

What I liked about this product was that we can vacuum, wash and dry the same area at the same time using the same machine and then move on to the next area. Compare this to using a mop where I have to vacuum the whole house first before mopping it (it is too troublesome to switch between 2 equipment to vacuum and mop the same area at the same time), the Hoover Floormate is more convenient. Of course, I also liked the fact that dirty water was separated from the clean water. 

My purchase of the Hoover floormate came with a small bottle of detergent to be used for floor washing. The instruction manual said we cannot use cleaning concentrates that contain solvent based ingredients. I have already finished using the Hoover floormate detergent a long time ago. Now I use the floor detergent from Magic Clean and it still worked perfectly. 

What I did not like about the Hoover Floormate was that it was a bit difficult to change directions when using the machine. It took me some time to get used to it. After 4 years, it is still in good working condition. 

I have noticed that this model was not available for sale anymore. Hoover has newer and improved models of the Hoover Floormate. If you are residing in Singapore and are considering to get one, you can get a step down transformer to work with your Hoover products. :)

Note: This step down transformer can work with any appliances that use 120V and frequency of 50hz to 60Hz. Check with the person selling the transformer before buying it.

Tuesday, 4 June 2013

Yoei Egg Boiler - Part 3 (Soft Boiled Eggs)

We tried to use the Yoei Egg Boiler to make soft boiled eggs.


The recipe given was based on 6 eggs stored at 25 °C. To get the eggs 50% cooked, we would need 20 ml of water. To get the eggs 70% cooked, we would need 30 ml of water.

As mentioned in previous posts, all our eggs were stored in the fridge, so we thought we probably needed more water than the recommended amount to make soft boiled eggs. For the first attempt, we put 50 ml of water on the heating plate to cook one egg. This resulted in a hard boiled egg. For the second attempt, we tried using 30 ml of water and the egg still turned out to be hard boiled egg. We have to mention that we did not take out the eggs immediately after the power light on the Yoei Egg Boiler went off.

For the third attempt, we tried 20 ml of water to cook one egg. After about 5 mins, I saw that the light above the button automatically switched off. I did not take it out right away. Perhaps that was why the egg whites turned out hard while the egg yolk was ok, slightly watery. I would think it was about 70% cooked.

Today, I put 15 ml of water on the heating plate to cook 2 eggs. About 4 to 5 minutes later, the light turned off. This was how one of the eggs looked.


This was the texture we wanted. 

We did not take out the eggs right away after the power light went off for all the attempts because we wanted to see how the eggs turned out unattended.


Part 1     Part 2     Part 4


Friday, 24 May 2013

Multi-Purpose Relaxation Cushion (Massage Cushion)

We went to "Japan Home" yesterday to get some cleaning brushes and were pleasantly surprised to find that they were having a special offer on the Multi-Purpose Relaxation Cushion (Massage Cushion).  They were on sale at $8.00.  So we bought one for ourselves.

This cushion can be used to massage on neck, back, thighs etc. It requires only 2 AA batteries to operate, so we can use it anywhere without the need of a power point.


Upon return to our home last night, I immediately tried the massage cushion on my legs (my legs were tired after one day of walking).  After that, I also tried on my back.  Not too bad. It did help to relieve some tense muscles.

The massage cushion only has one speed.  The massage is a mild vibration so even my daughter, Sera can use it.  Sera tried it on her legs and said she liked it.  Of course this cannot compare with those more expensive massager but it's ok for us.  For those people who liked greater vibration or more functions, then this may not worked for you.   

We are happy with the purchase at this price.


Saturday, 11 May 2013

Yoei Egg Boiler - Part 2 (Salted Eggs)


Yesterday, we used the Yoei Egg Boiler to cook salted eggs that were stored at room temperature (maybe about 29°C to 30°C). The recipe called for 50 ml of water to cook 6 eggs stored at 25°C. 


We put 50 ml of water onto the heating plate, placed 3 salted eggs on the egg holding tray, covered it and pressed the button.


See the button light up on the next picture.


The light indicator will go off once the eggs were done. The salted eggs were cooked in about 10 minutes.


Part 1    Part 3    Part 4


Wednesday, 1 May 2013

Yoei Egg Boiler - Part 1 (Hard Boiled Eggs)

We first saw this at NTUC about 2 weeks ago. At first we thought it might be a bit of a waste to buy this just for boiling eggs so we didn't buy it.


When I did some research on the internet, I found that this Yoei Egg Boiler can be used as a steamer to steam other food items such as dim sum, buns, etc. So I thought it might be a good idea to get this.

This egg boiler does not have a timer. It is controlled by varying the amount of water put on the heating element. It looked a bit like the steam sterilizer we used for sterilizing baby milk bottles.

Actually, for hard boiled eggs, it was easy to cook using a pot but I just find it too much of a hassle to wash a pot after just boiling one egg. As for half boiled eggs, it's not easy to control the time especially when you are doing something else at the same time. So we decided to get it after some consideration.


This unit comes with a small stainless steel bowl, measuring cup, egg holder, instruction manual and a recipe booklet. According to the manual, we are supposed to pour 50 ml of water onto the heating plate to cook hard boiled eggs for eggs stored at 25°C. However, as all our eggs were stored in the fridge, we added 80 ml of water (the maximum amount) to the heating plate. It took about 12 mins to cook the 3 eggs that we put on the egg holder. The eggs turned out good, not too soft and not too dry. Suitable for making our egg sandwiches.

We will try to cook salted eggs and half boiled eggs next time.

Part 2      Part 3     Part 4